Showing posts with label free. Show all posts

Lessons Learned from an Antique Key - Class Notes


Years back, I attempted to create a trapped bead on a key.  Being self taught, the initial project was full of valuable lessons.  Here are a few gems of knowledge for flameworkers attempting to create a trapped bead on an antique key.
Key Jargon for Reference:
 "Bow" - the part of the key a person turns or handles.
"Bit" - the part of the key which operates the lock.
"Shank" - the part of the key connecting the bit and bow.
What to look for when buying a key: 

  1. Shank:  The shank design is very important.  A hollow-barrel shank can receive a heavily dipped mandrel.  Try to avoid trapping bubbles in the bead release.  During heating, the trapped air expands and will "blow" the dried release directly out the end of the key barrel.  The sound and blast of hot air is very startling.  I suggest gently warming the barrel and wet bead release during the drying process to let the air expand and bubble out the end of the shank, near the mandrel.   
  2. Patina:  The patina helps to indicate the key's make up.  A dark patina usually indicates the key is made from cast iron.  Newer keys made of nickle/zinc alloys are not recommended for flameworking, and can shatter under the intense heat of a torch.
  3. Bow:  The bow gives a clue to the age of the key.  Circa 1800-1900, the bow of keys were commonly curved and smooth.  Bows can feature designs such as trifoils, bishop's miters and crosses. 
  4. Size:  Smaller keys are easier to balance on a mandrel.  The weight of larger keys can quickly wear upon a flameworker's fingers and wrist.  Keys between 1-2 inches are recommended.
  5. Quality:  The craftsmanship of the key will be reflected in the final project.  I tend to look for keys with unique bits and bows.  Some keys have tapered shanks and added fluting.
Upon locating the right key for the project, choose a mandrel that loosely fits the key's hollow barrel shank.  A good rule of thumb is to pick a mandrel 1/16 inch smaller than the barrel opening.  Dip the mandrel in bead release and insert into the key shank.  Be sure not to trap air in the barrel (refer to tip #1 above).  Place the flame dried dipped mandrel upright in a cup of sand until the key has cooled.  It is important for the key to be on the same axis as the mandrel's axis line. 
Once the bead release is dry and the key is cool, use a paint brush to coat the key's shank with bead release.  The final step of preparation will allow the glass to adhere to the shank during flameworking. 
Note:  A heavy coating will allow the bead to later spin freely on the key.  A light coating will keep the bead trapped in place on the key without movement.  I suggest using a gray Sludge Plus, Dip & Go. 
Upon drying, the key is ready for the bead of your choice!  After creating a bead on the key, place the "key" mandrel in a 950'F kiln to anneal.
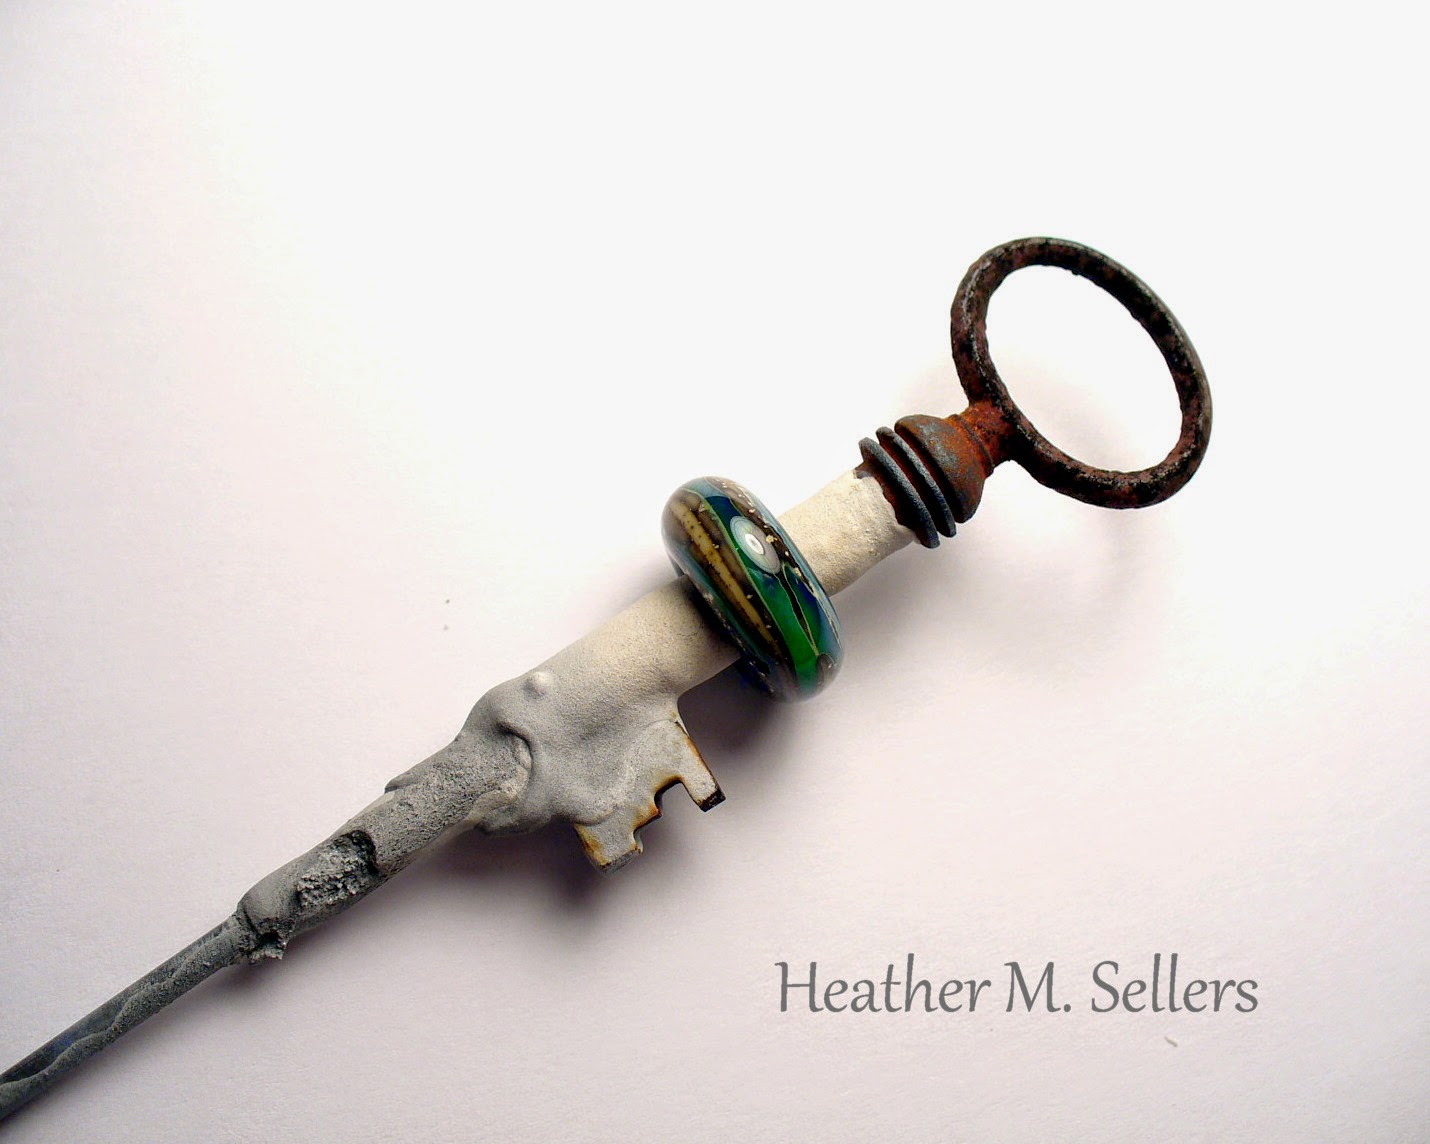
 
Once the cooled key emerges from a long soak in the kiln, clean the bead release with a mild soap and water solution.  A soft bristle brush comes in handy when cleaning the bit.
 
I hope you have enjoyed these notes from a recent class.  Feel free to email me with any questions.  Always remember, you are in charge of your own safety!

Happy Beading,
Heather

Free Penguin Tutorial

Visit www.bocbook.com to download a free penguin tutorial.  While you are there, check out the new Beads of Courage eBook available for $20 ($1.25 per tutorial).  100% of all sales go directly to the wonderful Arts in Medicine program. 
Happy Beading!

Sugar Skull Demos

I will be creating sugar skull beads from 10am to 1pm during the Dia de los Muertos Celebration at Mesa Arts Center.  Free admission.  Come and enjoy the festivities.  Hope to see you there!

Organizing Rogue Rods

Have you ever pulled a rod from the glass cabinet only to find you can't remember the correct spot to later store it?  With variations and over 300+ colors in the CoE 104 family comes rogue rods.  Here are a few tips and tricks to correctly reclassify pesky rods lingering around the studio.

Intense Black vs. Transparent Black:  Pull a think stringer of the rod, approximately 1mm.  If the stringer shows a transparent dark purple/black when held to a bright light, then the rod is transparent black.  A fine stringer of Intense Black will remain opaque in a bright light:


Transparent Pinks:  A few years back, I had 3 batches of transparent pinks become mixed.  I placed the rods on a sheet of white paper to verify color differences in a bright light, however it was impossible tell the colors apart.  In frustration, I bundled the glass and placed it on a shelf for later.  By accident I notice the end segments of the rods were different colors.  Taking the bundle outdoors in the bright sun, I was able to separate the colors by looking at the sliced end of the glass:

  Side view of sliced ends:

The Shadow Technique:  Transparent glass allows the light to shine through, casting a shadow.  The shadow projected on the foreground surface is unique to each color wavelength.  Notice the difference in the shadows of the CiM Testing photograph:
 
So when in doubt, try a few of the techniques to help sort things out.  Feel free to comment or send me an email with further questions.
Enjoy, Heather

Join me @ the Beads of Courage 2014 Bead Challenge - September 20th

Beyond the Torch and the ASBG is hosting the 2014 Beads of Courage Bead Challenge in Scottsdale, AZ.  Donna from CG Beadrollers donated some fabulous beadrollers for use during the event, then auctioned after event to benefit BoC.  The ASGB asked me to share a list of silly "kid" themed beads which were made with the BR-132 Snowman/Animal Body roller.  Here is a sneak-peek!  
If you would like to see the rest of the whimsical designs or place a bid on the wonderful CG Beadrollers, join me at the free event, hosted by Beyond the Torch.  I will be flameworking challenge beads and demonstrating the versatile CG Beadrollers between 10-2pm.  Come see the fabulous tools in action!
Omgosh, he has a belly button!